How to Set Up a Shopify Store from Scratch [Step-by-Step Guide]
Shopify has become the go-to platform for anyone who wants to launch an online store without hassle. With its simple setup, smooth design tools, and handy built-in features, Shopify makes it easy to start selling, even if you’re brand new to e-commerce.
In this post, you’ll get step-by-step instructions on how to set up a Shopify store from scratch. We’ll cover setting up your account, choosing a theme, adding products, setting up payments, and getting your store ready to launch. By the end, you’ll know exactly how to take your business online using Shopify’s all-in-one tools.
Get a free trial with this link!
Disclosure: our content is reader-supported, which means we may earn commissions from links at no cost to you.
Planning Your Shopify Store
Before you sign up for Shopify and start customizing your store, it’s important to lay a solid foundation. Thoughtful planning at this stage will save you time, money, and headaches later. You’ll want to have a clear idea of what you’re selling, who you’re selling to, and how your store will look and feel. Let’s break down the key steps to getting your store plan in place.
Choosing Your Niche and Products
Picking the right niche and products can set your store up for long-term growth. It pays to take time here and make smart choices.
Tips for choosing your niche:
- Look for a niche that matches your interests or skills.
- Check that there’s demand. Use Google Trends, Amazon Best Sellers, and social media to see what people buy.
- Avoid overcrowded markets unless you have a unique angle.
- Compare the competition—search for similar stores to see what gaps you can fill.
How to source products:
- Consider dropshipping, print-on-demand, or wholesale suppliers for a hands-off start.
- Look for local manufacturers or artisans if you want more control over quality.
- Reach out to distributors or buy directly from brands.
Validating product ideas:
- Build a simple landing page and run paid ads to test interest.
- Offer pre-orders to measure demand before investing deeply.
- Search Reddit, Facebook groups, or niche forums to see what problems people face and what solutions they seek.
When you choose a niche and source the right products, you set your store apart from day one.
Defining Your Target Audience
Knowing your ideal customer helps you make decisions on everything—from product details to marketing strategies.
Steps for finding your target audience:
- Write down basic traits: age, gender, income, location, hobbies.
- Picture a typical customer. What challenges do they face? What motivates them to buy?
- Check out competitor stores. Read their reviews and comments to spot trends in who buys and why.
Use these sources to learn more about your audience:
- Social platforms: Follow hashtags and groups that relate to your niche.
- Surveys: Set up a quick Google Form and share it in online communities.
- Analytics tools: Once your site is live, tools like Google Analytics or Shopify’s built-in dashboard show you who visits and buys.
Key tip: The better you know your audience, the easier it becomes to create products, ads, and content they care about.
Branding and Store Structure Essentials
Branding shapes the first impression buyers have of your store, while a clear store structure makes shopping easy and intuitive.
Get started with these branding basics:
- Choose a store name
- Pick a name that fits your niche and stands out.
- Make sure the domain is available for a matching website address.
- Design a logo
- Use free tools like Canva or work with a designer for a polished look.
- Gather brand assets
- Decide on key colors and fonts to use across your store for consistency.
Plan your store layout and navigation:
- List the key pages your shoppers need:
- Home
- Shop/Products
- About Us
- Contact
- FAQs
- Policies (Shipping, Returns, Privacy)
- Map out your menu so visitors can find what they need in one or two clicks.
- Keep the layout simple. Prioritize what matters most to new customers up front.
A great name, a simple logo, and clear navigation will help your store look trustworthy and professional, even in its early days. This planning stage is a small step that makes a big difference when you launch.
Setting Up Your Shopify Store Account
Now that you’ve mapped out your store’s foundation, it’s time to bring your ideas to life inside Shopify. This section covers what you need to know to get your store set up right the first time. From choosing your Shopify plan to tweaking your store’s settings, these steps put you in full control of your online business.
Signing Up and Choosing a Shopify Plan
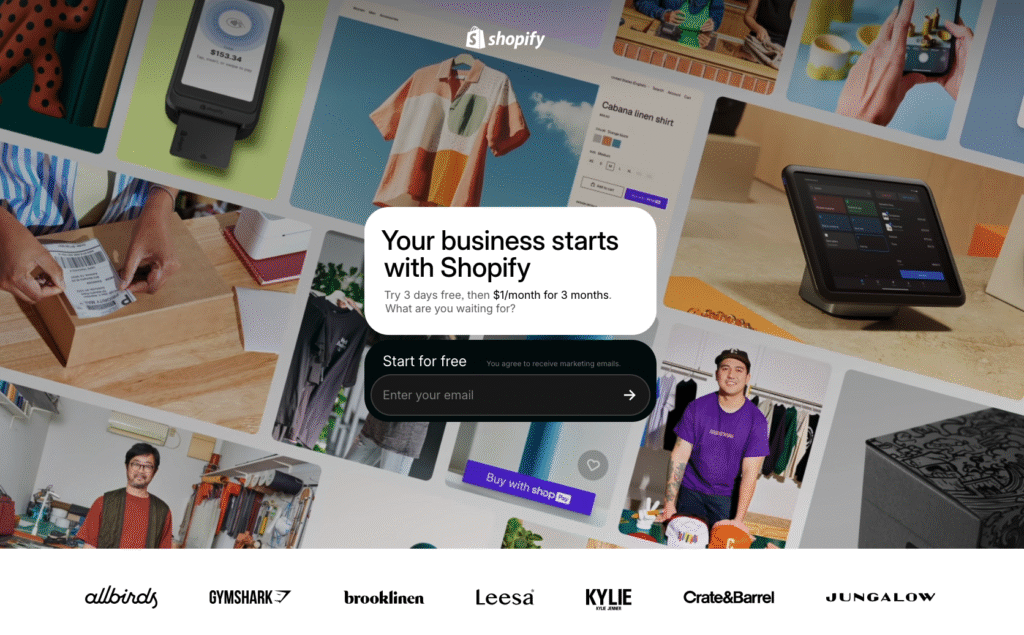
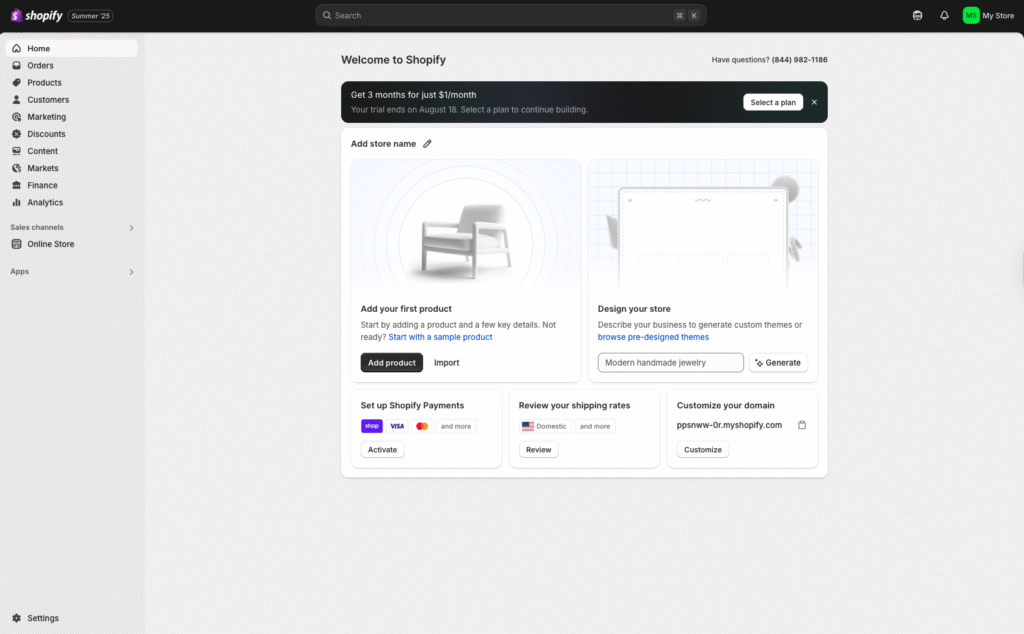
Getting started with Shopify is quick and simple. Begin by visiting the Shopify website. Click “Start free trial” and enter your email address, password, and a store name. Shopify will check if the name is available and reserve it for your use.
Shopify Plan Options:
After creating your account, Shopify walks you through a free trial. This is a great way to try the platform before paying. During your trial, you can build your store, add products, and get a feel for the features. Shopify won’t charge you until you choose a paid plan.
Popular Shopify Plans:
- Basic: Best for beginners and smaller stores. Includes all main features like unlimited products, basic reports, and two staff accounts.
- Shopify (Standard): Ideal if you already have sales and want extra features, such as professional reports and more staff accounts.
- Advanced: Great for growing businesses that need advanced reports and better shipping rates.
- Shopify Plus: Designed for large brands and enterprise needs (usually not needed for new stores).
When picking your plan, think about:
- Your expected sales volume
- Team size and staff account needs
- Whether you need advanced reporting or automation
- Your budget
You can always start with Basic and upgrade later as your store grows.
Configuring General Store Settings
Right after sign-up, it’s important to set up your store’s core information, so everything runs smoothly. Navigate to the “Settings” area in your Shopify dashboard. Here are the key settings to focus on:
Store Details
- Add your official store name and contact email—these show up on customer receipts and notifications.
- Fill in your business address for payouts and billing.
Store Currency
- Choose the main currency for your store, such as USD, EUR, or GBP. Pick the one your target customers use the most. You can change this later, but it’s easiest to set it at the start because switching after making sales can cause issues.
Location and Time Zone
- Set your store’s time zone for order tracking and reporting accuracy.
Customer Accounts
- Decide if you want to let customers check out as guests, create accounts, or both.
- Enabling customer accounts can improve trust and make repeat orders easier, but requiring accounts can sometimes discourage new shoppers from buying.
Be sure to save all changes before leaving each page.
Customizing Store Preferences
Your store settings don’t stop at the basics. Tailoring checkout, tax, shipping, and notifications helps you give shoppers a smooth buying experience from start to finish.
Checkout Settings
- Choose between customer accounts being required, optional, or disabled.
- Add legal pages (like refund and privacy policies) to be shown during checkout.
- Enable order processing automation, such as automatically marking orders as fulfilled or archiving them.
Taxes
- Let Shopify handle standard sales tax rules for your country or set up custom tax rates as needed.
- Enter your tax registration numbers if your area requires it.
Shipping
- Set up shipping zones based on where you’ll ship products.
- Add shipping rates by price, weight, or offer flat-rate/free shipping.
- If you use dropshipping or print-on-demand, connect any apps handling shipping rates for you.
Notifications
- Personalize email templates for orders, shipping updates, and customer messages.
- Update store branding in your notifications, using your logo and colors for a professional feel.
Quick tips for smooth setup:
- Double-check each setting for errors to avoid headaches later.
- If you’re unsure about local tax or shipping laws, Shopify’s Help Center and community forums are full of clear answers.
Spending some focused time on these details now will help your store run better, look more trustable, and make the shopping process smooth for every customer.
Designing and Launching Your Shopify Store
Bringing your Shopify store to life is where things start getting real. This stage is all about turning your ideas and planning into an actual shop people can browse, buy from, and remember. You’ll pick out your store’s look, fill it with products, organize your catalog, and get your checkout ready so buyers have a smooth path from browsing to payment. Let’s break down the main steps to get your store launch-ready.
Selecting and Customizing a Shopify Theme
Your theme decides how your store looks and feels to visitors. The right design builds trust and makes shopping easy. Shopify offers dozens of free and paid themes in its Theme Store, each with different layouts and features.
How to pick a theme:
- From your Shopify admin, go to “Online Store” then “Themes.”
- Browse the Shopify Theme Store. Filter by industry or features if you have a specific style in mind.
- Preview demo stores for each theme so you see the store in action on both desktop and mobile.
What to consider when choosing a theme:
- Visual style and colors: Match these to your logo and branding.
- Built-in features: Some themes have advanced filters, product quick view, or video integration.
- Flexibility: Think about how easy it will be to make changes later.
Once you’ve picked a theme:
- Click “Add” then “Customize” in your admin panel.
- Use Shopify’s drag-and-drop editor to tweak your homepage, collections, and product pages.
- Change colors, upload your logo, adjust font styles, update navigation menus, and set up banners or slideshows.
- Add your main promotional message, feature your best products, and make sure your contact details are visible.
Quick tip: Start with the basics. You can always customize more as you grow.
Adding and Organizing Products
Adding products is how you fill your digital shelves. The process is simple but getting it right helps buyers find what they want faster.
To add a new product in Shopify:
- Go to “Products” in your dashboard.
- Click “Add product.”
Now it’s time for details:
- Title and description: Keep titles clear and accurate. Write product descriptions using natural language that highlights benefits, features, and why buyers will love it.
- Images: Use high-quality photos (at least 800×800 pixels for zoom). Show the product from multiple angles or in use.
- Pricing: Set your selling price and “Compare at price” if you want to show a discount.
- Inventory: Add SKU (stock keeping unit) numbers, track quantity, set if you want to allow backorders.
- Variants: If you sell products in different sizes, colors, or styles, add each variant here.
Organizing your products:
- Create “Collections” to group products by type, season, theme, or sale. For example, “Best Sellers,” “New Arrivals,” “Under $50.”
- Set up tags for easy filtering and searching on your site.
- Add products to their collections while creating or editing them. Your menu will often link to these collections for easy navigation.
A well-organized product catalog makes things easy for shoppers and increases the chance of more sales.
Setting Up Payments, Shipping, and Taxes
Now, get your checkout process ready so you can collect money, ship orders, and stay tax-compliant.
Payments:
- In Shopify, go to “Settings” then “Payments.”
- Activate Shopify Payments for credit and debit cards if available in your country.
- Add alternative methods like PayPal, Apple Pay, Shop Pay, or manual payment options (bank transfer, cash on delivery).
Shipping:
- Head to “Settings” then “Shipping and delivery.”
- Set up shipping zones based on where you plan to sell (local, national, or international).
- Choose your shipping rates. You can charge flat fees, vary rates by order weight or price, or offer free shipping for orders over a certain amount.
- Add package types if you want real-time carrier-calculated rates.
Taxes:
- Go to “Settings” then “Taxes and duties.”
- Let Shopify automatically set tax rates for your country or customize them if needed.
- Enter your business’s tax registration details.
Tips:
- Test your payment setup with a small transaction.
- Double-check shipping rates for accuracy. Unclear shipping costs often lead to cart abandonment.
Store Review, Testing, and Launch
Before you open your digital doors, scrutinize your setup so every detail works as it should.
Review your store thoroughly:
- Check product pages for typos, missing images, or incorrect prices.
- Click through all menus and links to make sure they work.
- Ensure contact, about, policy, and FAQ pages are clear and easy to find.
Test your checkout:
- Place a test order using Shopify’s “Bogus Gateway” (in the payment settings) to walk through the full checkout process.
- Make sure you receive the confirmation email and the order appears in your dashboard.
Proofread and polish:
- Read all your site content. Spelling errors or unclear messages can hurt trust.
- See how your site looks on different devices (desktop, mobile, tablets).
Final launch steps:
- Remove password protection from your store (Dashboard > Online Store > Preferences).
- Announce your launch on social media and to your email list.
- Set up traffic analytics, such as Google Analytics and Shopify’s built-in reports, so you can track visitors and sales from day one.
Putting in care at this stage builds immediate trust with future customers and helps create a smooth, professional buying experience right from your first sale.
Final Thoughts
Once you’ve opened your store, you’ve already gone further than most people ever will. You’re ready to build something real—don’t wait to get started.
Start for FREE with this link.
Start sharing your new site, connect with your first customers, and watch what works so you can improve. Next, focus on telling your brand’s story and driving traffic with smart marketing—think email, social platforms, or partnerships.
Thanks for reading. If you found this guide helpful, let me know what you want to learn next or share your new store.
No responses yet